
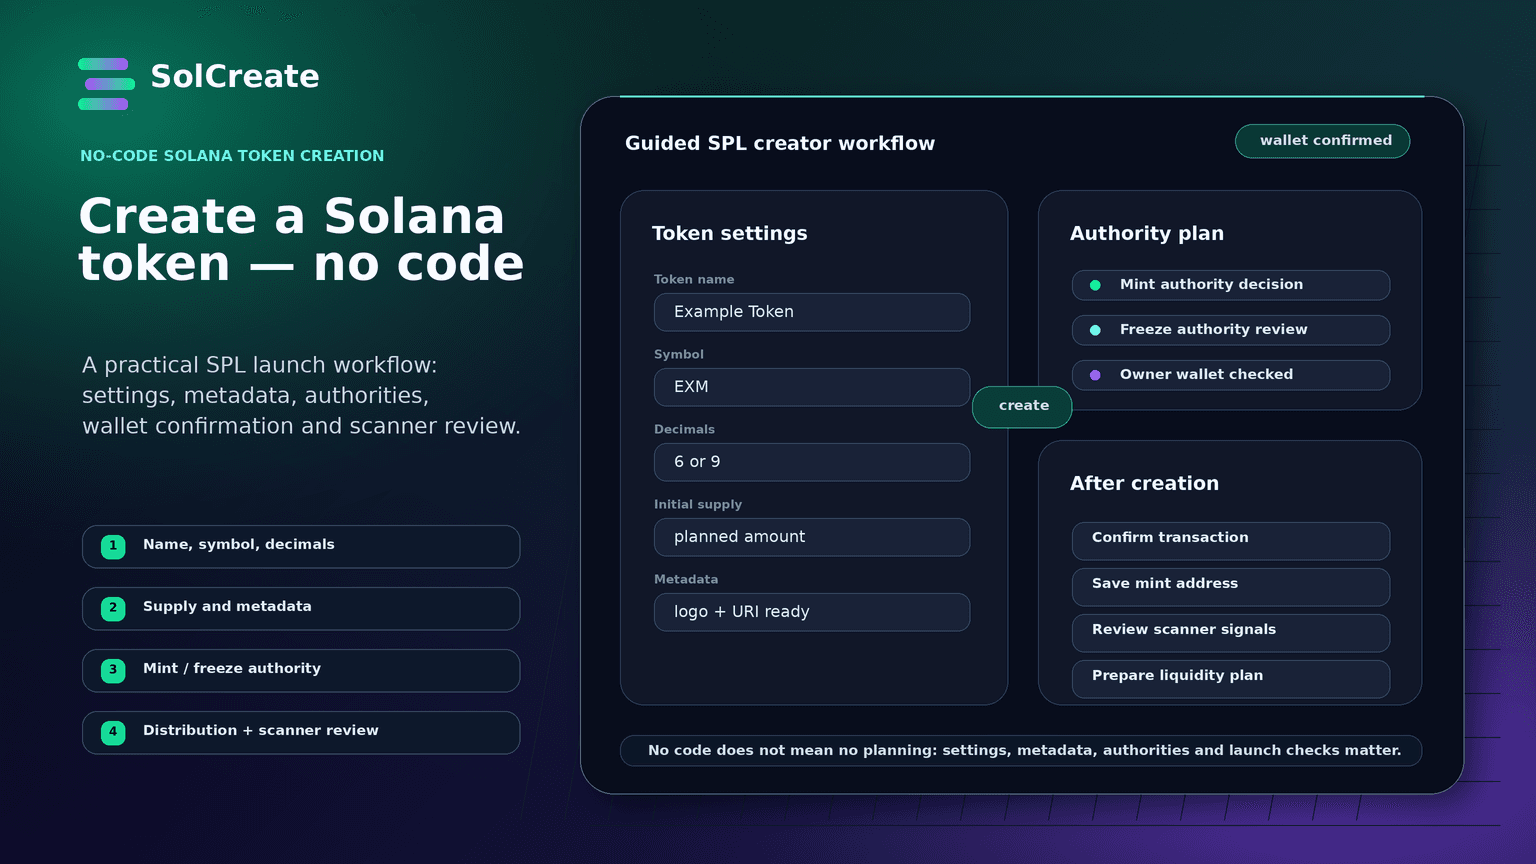
Creating a Solana token is much easier than it used to be. You no longer need to write a custom program, run a local validator, or stitch together several command-line tools just to launch a basic SPL token.
But “without coding” should not mean “without planning.” A token still has public settings, metadata, authorities, supply decisions, wallet distribution, liquidity choices and buyer-visible risk signals. If those pieces are rushed, the token may technically exist on-chain but still look unfinished, confusing or risky to the people reviewing it.
This guide explains the practical workflow behind creating a Solana token without coding: what to prepare before opening a creator tool, what each setting means, and how to connect the creation step with the rest of the launch plan.
Quick facts
- A Solana token usually uses the SPL token standard.
- A no-code Solana token creator helps you configure and create the token through a wallet-confirmed flow.
- You still need to plan the token name, symbol, decimals, supply, metadata and owner wallet carefully.
- Mint authority and freeze authority are major trust signals for many buyers and scanners.
- Token creation is only the first step; launch planning also includes distribution, liquidity, vesting, communication and risk-signal review.
- SolCreate is built for this workflow: create the token, prepare launch actions and review scanner-visible signals from one no-code platform.
What “create a Solana token without coding” actually means
Creating a token without coding means using a guided interface instead of writing deployment scripts yourself. The creator tool prepares the transaction, your wallet shows what needs to be confirmed, and the token is created on Solana once the transaction succeeds.
That does not remove the need to understand the settings. The blockchain will store the result of your choices. If the supply is wrong, the symbol is confusing, or the metadata looks unfinished, the issue is still public even if the creator flow was simple.
A good no-code workflow should therefore help you do two things:
- Create the token with the intended settings.
- Prepare the surrounding launch signals so the token is easier to understand after creation.
For Solana builders, that usually means planning the SPL token settings first, then reviewing metadata, authority controls, distribution, liquidity and scanner results before promoting the token widely.
Step 1: Define the token purpose before choosing settings
Before you open a Solana token creator, write down the token’s purpose in one plain paragraph. Is it a community token, utility token, meme coin, membership asset, in-app currency, rewards token or experimental launch?
This matters because the purpose affects the settings:
- A community token may need clear distribution rules.
- A utility token may need stronger documentation around what the token does and does not do.
- A meme coin may prioritize simple branding, fixed supply and transparent launch communication.
- A rewards token may need a realistic plan for minting, vesting or future emissions.
The token purpose should also shape public communication. Avoid vague claims like “safe,” “guaranteed,” or “next big thing.” Instead, explain what the token is, what settings are live, who controls the authorities and what users should verify.
Step 2: Choose the name, symbol and decimals carefully
The token name and symbol are the first details most users see. They appear in wallets, explorers, scanners and community posts. Treat them as public infrastructure, not just branding.
A good token name should be readable, specific and consistent with your website, social profile or community identity. A good symbol should be short enough for wallets and trading interfaces, but not so generic that it can be confused with another asset.
Decimals control how the token is displayed in wallets and interfaces. Many SPL tokens use 6 or 9 decimals, but the right choice depends on how the token will be used. A token meant for small unit transfers may need more decimals. A simple community token may not.
Before creation, check:
- Is the token name spelled correctly?
- Is the symbol final?
- Are decimals appropriate for the intended use?
- Does the supply make sense with those decimals?
- Will the token still be understandable in explorers and wallet UIs?
Small mistakes here can make the launch look careless, even if the transaction itself succeeds.
Step 3: Plan initial supply and future minting
Initial supply is one of the most important launch decisions. It affects holder expectations, distribution, pricing context and how people interpret future token movements.
A fixed-supply token can be easier to explain because the supply is created once and no new tokens are expected later. A mintable token gives the creator more flexibility, but it also creates a trust question: who can mint more, under what conditions, and how will the community know?
If you keep mint authority, document why. If you revoke mint authority, make sure the initial supply is correct before doing so. Revoking an authority can be useful for trust, but it also removes future flexibility.
A practical pre-creation supply checklist:
- Define total initial supply in human-readable units.
- Confirm decimals and display units match the supply plan.
- Decide whether mint authority should remain active after launch.
- Prepare a public explanation if future minting is possible.
- Avoid supply choices that only make sense because of hype or short-term marketing.
Step 4: Prepare metadata before creating the token
Token metadata helps wallets, explorers and users understand what they are looking at. For a Solana token, metadata usually includes the name, symbol, logo, description and URI-backed data.
Metadata should be ready before the public launch. A token with missing or inconsistent metadata can look unfinished, even if the token contract itself is valid.
Prepare:
- A clean token logo at the right size.
- A short description that avoids exaggerated claims.
- Consistent project naming across website, social profiles and token metadata.
- A reliable metadata URI or upload flow.
- A decision on whether metadata update authority will remain active.
If metadata may need edits after creation, explain why update authority remains active. If metadata is final, reducing or removing update control can be part of the trust story. The important point is not that every token must make the same choice; it is that the choice should be intentional and easy to explain.
Step 5: Understand mint authority and freeze authority
Two settings deserve special attention: mint authority and freeze authority.
Mint authority controls whether more tokens can be created later. If mint authority is active, the token supply may increase. That is not automatically bad, but it must match the launch plan.
Freeze authority controls whether token accounts can be frozen. This can be useful for some controlled environments, but for open community tokens it may raise concerns if buyers do not understand why it exists.
Many scanner tools and experienced buyers look at these authority settings before trusting a new token. If the settings are unexpected, the token may be treated as higher risk even if the team has no bad intent.
Before launch, decide:
- Should mint authority be kept, transferred or revoked?
- Should freeze authority exist at all?
- Who controls the authority wallet?
- Is the authority wallet a single wallet or a multisig process?
- Can the community understand the reason behind the decision?
SolCreate’s Solana creator and supporting guides are designed around this exact preparation step: create the token, but also understand the controls attached to it.
Step 6: Decide the receiving wallet and distribution plan
The first wallet that receives supply matters. If all supply goes to one wallet, observers may ask why. If many wallets receive tokens, observers may ask whether the distribution is organized, fair or connected to hidden wallets.
A distribution plan does not need to be complicated. It just needs to be clear.
Common buckets include:
- Community allocation
- Liquidity allocation
- Treasury wallet
- Team or contributor allocation
- Airdrop or campaign allocation
- Vesting-controlled allocation
If you plan to use a multisender or airdrop flow later, prepare the wallet list before launch. Remove duplicates, test small batches and keep a record of what each distribution is meant to represent.
Poor distribution clarity can create unnecessary suspicion. Clean distribution planning makes the token easier to review.
Step 7: Create the token through a no-code SPL token creator
Once the settings are ready, the creation step should be straightforward.
A typical no-code Solana token creator flow looks like this:
- Connect a supported Solana wallet.
- Enter the token name and symbol.
- Choose decimals and initial supply.
- Add or prepare metadata.
- Review authority settings.
- Review the fee and transaction summary.
- Confirm the transaction in your wallet.
- Save the token mint address after creation.
The mint address is important. It is the public identifier for the token and should be stored carefully. You will use it for metadata checks, scanner review, liquidity setup, documentation, community posts and support conversations.
Do not rush the confirmation screen. If a setting is wrong before signing, stop and fix it. It is easier to correct a form than to explain a preventable on-chain mistake later.
Step 8: Review the token after creation
After the token is created, verify the result before announcing it.
Check:
- Does the token name display correctly?
- Is the symbol correct?
- Is the supply correct?
- Are decimals correct?
- Does metadata display as expected?
- Are mint and freeze authority settings what you intended?
- Does the owner wallet match the launch plan?
- Is the mint address saved in your internal launch notes?
This is where scanner-style review becomes useful. A scanner does not guarantee that a token is safe, but it can surface signals that buyers, communities and launch partners may also inspect.
For example, SolCreate’s scan token authority and holder signals path is useful for reviewing authority, holder and risk-signal context after creation, especially before public promotion begins.
Step 9: Plan liquidity only after the token settings are final
Liquidity should not be the first thing you do after token creation. It should happen after the token settings, metadata, authority decisions and distribution plan are clear.
A rushed liquidity setup can create problems:
- Wrong initial pool ratio
- Confusing price context
- LP tokens controlled by an unexplained wallet
- No public plan for LP lock or custody
- Mismatch between launch communication and on-chain activity
Before adding liquidity, decide which portion of supply is allocated to the pool, what paired asset will be used, and how LP tokens will be handled. If you plan to lock LP tokens, prepare the lock duration and public explanation before the launch announcement.
The goal is not to promise safety. The goal is to reduce confusion by making the launch mechanics visible and understandable.
Step 10: Build a simple public launch note
Before sending traffic to the token, prepare a short public launch note. This can be used on your website, X profile, Discord, Telegram, docs or community announcement.
A good launch note includes:
- Token name and symbol
- Mint address
- Chain: Solana
- Purpose of the token
- Initial supply and decimals
- Mint authority status
- Freeze authority status
- Metadata status
- Distribution summary
- Liquidity status or planned liquidity timing
- Scanner or explorer links for independent review
This is especially important for beginners. Many token launches fail at communication, not only at technical execution. If buyers and community members have to guess what happened, they may assume the worst.
Where SolCreate fits in the no-code workflow
SolCreate is designed for creators who want one practical place to create a token, prepare launch actions and review risk signals without writing custom scripts.
For Solana creators, the key paths are:
- Solana Token Creator for the main 0.03 SOL creation flow after the checklist is ready.
- SPL Token Creator for SPL-focused token setup.
- Metadata planning guides for name, symbol, logo and update authority.
- Mint and freeze authority education for trust-sensitive settings.
- Liquidity and LP lock guides for launch preparation.
- Vesting and multisender workflows for distribution planning.
- Scanner review for risk-signal checks before wider promotion.
The best use of a no-code platform is not “click once and hope.” It is using the platform to reduce technical friction while still making deliberate launch decisions. When the plan is ready, move from this guide to the Solana Token Creator instead of treating this article as the commercial creation page.
Common mistakes to avoid
Creating the token before the launch plan exists
The token can be created quickly, but the public launch should not be improvised. Plan supply, metadata, authorities, distribution and liquidity first.
Treating authority settings as minor details
Mint and freeze authority are often reviewed by scanners and experienced users. If they remain active, explain why.
Using unclear metadata
A low-quality logo, vague description or inconsistent symbol can make a token look unfinished.
Sending all supply to one wallet without context
There may be valid reasons for a single receiving wallet, but explain the next distribution step if the supply will move later.
Adding liquidity before reviewing the token
Verify the token first. Liquidity makes mistakes more visible and harder to unwind.
Making safety or profit claims
Do not claim that a token is safe, guaranteed or likely to increase in value. Focus on transparent settings and verifiable information.
FAQ
Can I create a Solana token without coding?
Yes. A no-code Solana token creator can help you configure the token name, symbol, decimals, supply, metadata and authority settings, then create the token through a wallet-confirmed transaction.
Is a Solana token the same as an SPL token?
Most standard tokens on Solana use the SPL token standard. When people say “create a Solana token,” they usually mean creating an SPL token or a related Solana token standard through a compatible wallet and tool.
Do I need to revoke mint authority?
Not always. Revoking mint authority can make a fixed-supply launch easier to explain, but some projects need future minting. The important point is to make the decision intentionally and communicate it clearly.
Should freeze authority be enabled?
It depends on the token’s use case. For open community tokens, active freeze authority can raise trust questions. If it remains active, explain why it exists and who controls it.
What should I prepare before creating the token?
Prepare the token name, symbol, decimals, initial supply, metadata, logo, authority plan, receiving wallet, distribution plan and launch communication. Token creation should be the execution step after these choices are clear.
Can a scanner prove that my token is safe?
No scanner can guarantee safety. A scanner can highlight risk signals such as authority settings, holder concentration or suspicious patterns. Use scanner results as part of transparent launch communication, not as a guarantee.
Final takeaway
Creating a Solana token without coding is now accessible to almost any builder. The hard part is no longer only technical deployment. The hard part is making the token understandable, verifiable and launch-ready.
Plan the settings first. Use the no-code creator carefully. Review the result. Then connect the token to metadata, authority decisions, distribution, liquidity and scanner-visible risk signals before the public launch.
That workflow gives your community a clearer token to inspect and gives your team fewer preventable mistakes to explain later.